
How to Stake XPRT (Persistence)
Learn how to stake XPRT tokens with the Keplr Wallet browser extension via Blockdaemon in this step-by-step guide.
The Persistence blockchain is a Tendermint-based, specialized Layer-1 network powering an ecosystem of DeFi applications.
In this guide, you’ll learn how to stake XPRT tokens with the Keplr Wallet browser extension. Note that the staking process is non-custodial, which means that you are in full control of your private keys.
Here’s how to stake your Persistence XPRT tokens:
Step 1 – Access Your Keplr Wallet
- Go to keplr.app, and download and install the Keplr Wallet for the relevant browser.
- Click the Kepler icon to open the Keplr Wallet.
[block:image]
{
"images": [
{
"image": [
"https://files.readme.io/fce3629-image.png",
null,
null
],
"align": "center",
"border": true
}
]
}
[/block] - Click the Cosmos Hub arrow, scroll down, and then select Persistence.
[block:image]
{
"images": [
{
"image": [
"https://files.readme.io/c44be81-image.png",
null,
null
],
"align": "center",
"border": true
}
]
}
[/block] - You can now see your XPRT balance. If you don’t have any XPRT tokens in your wallet, you’ll have to fund your wallet. How you deposit tokens to the Keplr Wallet varies depending on which XPRT wallet you’re transferring the tokens from.
Caution!
Make sure you familiarize yourself with the process before buying or sending tokens.
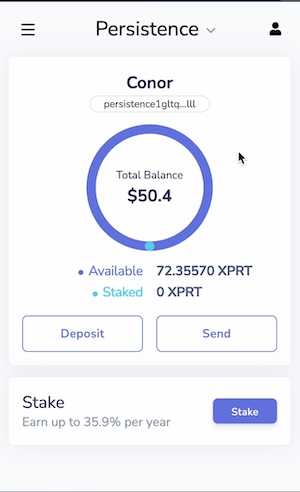
Step 2 – Select the Blockdaemon Validator
- Click the Stake button. You’re now taken to the Keplr Dashboard.
[block:image]
{
"images": [
{
"image": [
"https://files.readme.io/8a87ce7-image.png",
null,
null
],
"align": "center",
"border": true
}
]
}
[/block] - Scroll down to All Persistence Validators, and enter Blockdaemon in the Search Validator field.
[block:image]
{
"images": [
{
"image": [
"https://files.readme.io/8da6350-image.png",
null,
null
],
"align": "center",
"border": true
}
]
}
[/block] - Click Manage to start staking.
[block:image]
{
"images": [
{
"image": [
"https://files.readme.io/c63f4ab-image.png",
null,
null
],
"align": "center",
"border": true
}
]
}
[/block]
Step 3 – Specify the Stake Amount
- In the dialog that appears, click Delegate.
[block:image]
{
"images": [
{
"image": [
"https://files.readme.io/a3a0579-image.png",
null,
null
],
"align": "center",
"border": true
}
]
}
[/block] - Verify that you’ve selected the Blockdaemon validator, enter the amount of XPRT you want to delegate in the Amount to Delegate field, and then click Delegate. Note that your funds will be locked for 21 days.
[block:image]
{
"images": [
{
"image": [
"https://files.readme.io/2199bb0-image.png",
null,
null
],
"align": "center",
"border": true
}
]
}
[/block] - In the dialog that appears, verify that the information is correct, and then click Approve. There’s a message saying Transaction in progress.
[block:image]
{
"images": [
{
"image": [
"https://files.readme.io/90ec72d-image.png",
null,
null
],
"align": "center",
"border": true
}
]
}
[/block] - Wait for the transaction to be processed. When the transaction has completed there’s a message saying Transaction Successful. Under My Validators, you can see the Blockdaemon Validator and the amount you’ve staked.
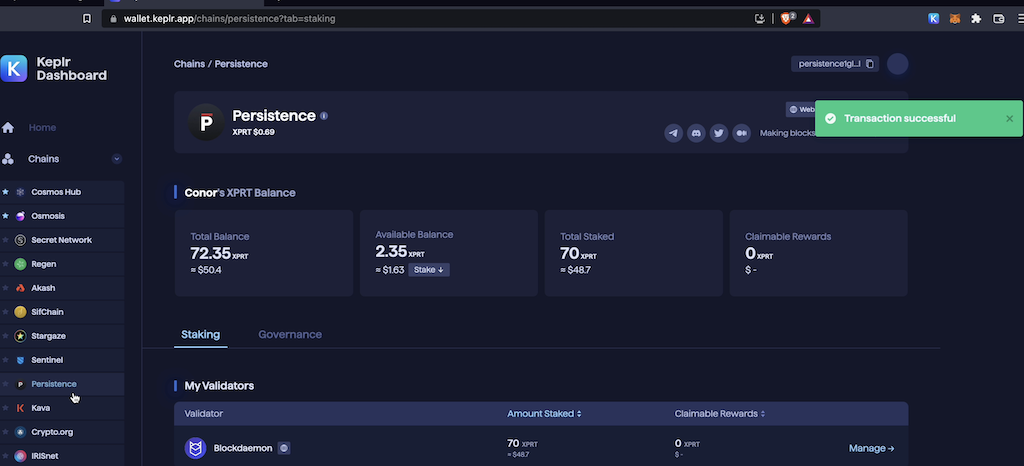
- After 2-3 days, you’ll start earning rewards. Go to the Keplr Dashboard and check your staking rewards in the Claimable Rewards area.
Check out our XPRT staking walkthrough video:
Interested in running your own Persistence Validator? Send us a message to get started.
Updated 4 months ago