
How to Deploy a Node
Follow these steps to launch a dedicated node with Blockdaemon. Running your own node allows you to access transaction data, blockchain history, and more.
A blockchain is replicated across thousands of computers, known as nodes. A node is a full record of a blockchain. Nodes are the backbone of a blockchain. They keep track of all transactions from one account to another.
Running your node is useful and powerful. You can access transaction data, blockchain history, and more.
Info:
You won’t be charged until the very last step, so you’re free to cancel at any point before that without incurring any cost.
Follow these steps to launch a dedicated node:
Step 1 – The Blockdaemon Web App
The first step in deploying a node is to visit the Blockdaemon Web App.
Info:
If you're a new customer, you'll need to create a Free Blockdaemon account - don't worry; it only takes a few steps.
- Once you have logged on to the web app, click the Deploy a Node button in the middle of the Overview screen.
- The Deploy a Node area is your blockchain storefront. Here, you will find a full suite of Blockdaemon-hosted protocols.
Step 2 – Select Your Protocol
The next step is to choose the blockchain protocol and network.
For this example, we're interested in deploying an Ethereum Geth node.
- Search for the protocol or scroll down the page until you find the entry (Ethereum, in our case).
- Click the protocol to select it.
- This will take you to the protocol deployment page with all available node configuration options.
Step 3 – Choose Your Options
Now you’ve selected your protocol, it’s time to choose your options.
There are a few options on the deployment page, these include:
- Name of your node
- Network
- Node Type
- Hosting Provider
- Location
Note: You can change the node name and pre-selected options if required. However, for this example, we will keep the default settings.
- Once you’ve selected the options, click ‘Proceed to checkout'.
What if Your Options Are Not Available?
If your options are unavailable, contact us directly. More advanced node configurations and validators are available this way.
Step 4 – Checkout
The final step, all that’s left is to confirm your order and pay.
Info:
If you have a promotional code, now is the time to enter it.
- Once you’re happy your details are correct, click ‘Subscribe’ to pay and launch your node!
Step 5 – Node Detail Page
You will now be directed to your node detail page.
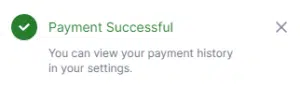
Here, you will see the ‘Payment Successful’ pop-up.
As with all nodes, yours will need time to synchronize with the blockchain. A progress bar shows your Node Block Height as it synchronizes.
Note that synchronization time varies per protocol. If you’re concerned it is taking too long, your Node Detail Page contains information on when and how to contact support.

🏃 You’re Ready to Go
Congratulations. You have successfully launched a blockchain node with Blockdaemon.
Once the node is synchronized, your node detail page will be updated to show:
- Connection info
- Monitoring & hosting info
- Helpful documentation and connection details.
Are you ready to get started?
Get registered with Blockdaemon and deploy a node now.
Check out this video guide as well for a tutorial on how to self-deploy a node with Blockdaemon.
👋 Need Help?
Contact us through email or our support page for any issues, bugs, or assistance you may need.
Updated 2 months ago